Week 1: M5StickC Plus Setup
M5StickC Plus setup guide. If your device is grey with a blue button (M5StickS3), go back and select the correct guide.
The M5StickC Plus connects to UIFlow 2.0 over USB.
Step 2: Device Setup
Section titled “Step 2: Device Setup”3 steps — do them in this order. Do not plug in the device before step 2a is done.
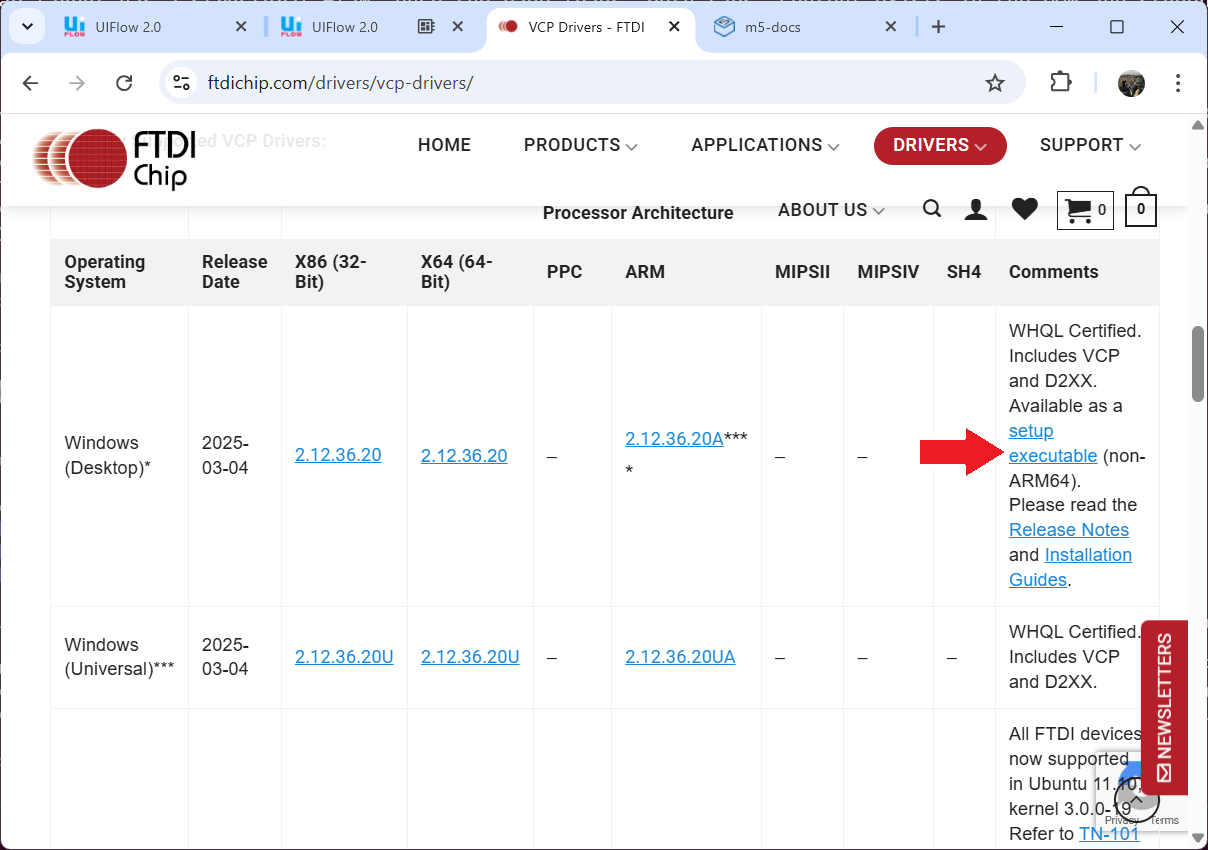
2a. Install the FTDI USB Driver (Windows — do this first)
Section titled “2a. Install the FTDI USB Driver (Windows — do this first)”The M5StickC Plus uses an FTDI FT232R USB-serial chip. Install the driver before plugging in the device.
- Go to ftdichip.com/drivers/vcp-drivers/
- Download the setup executable for Windows (Desktop) — see the arrow in the screenshot below
- Run the installer, then restart your computer
After restarting, plug in the StickC Plus with a data USB cable, then open Device Manager (right-click Start → Device Manager).
Mac: Setup on macOS has known complications that vary by hardware revision. Use a Windows laptop if available. If you only have a Mac, speak to your TA before the session — do not attempt driver installs during the lab.
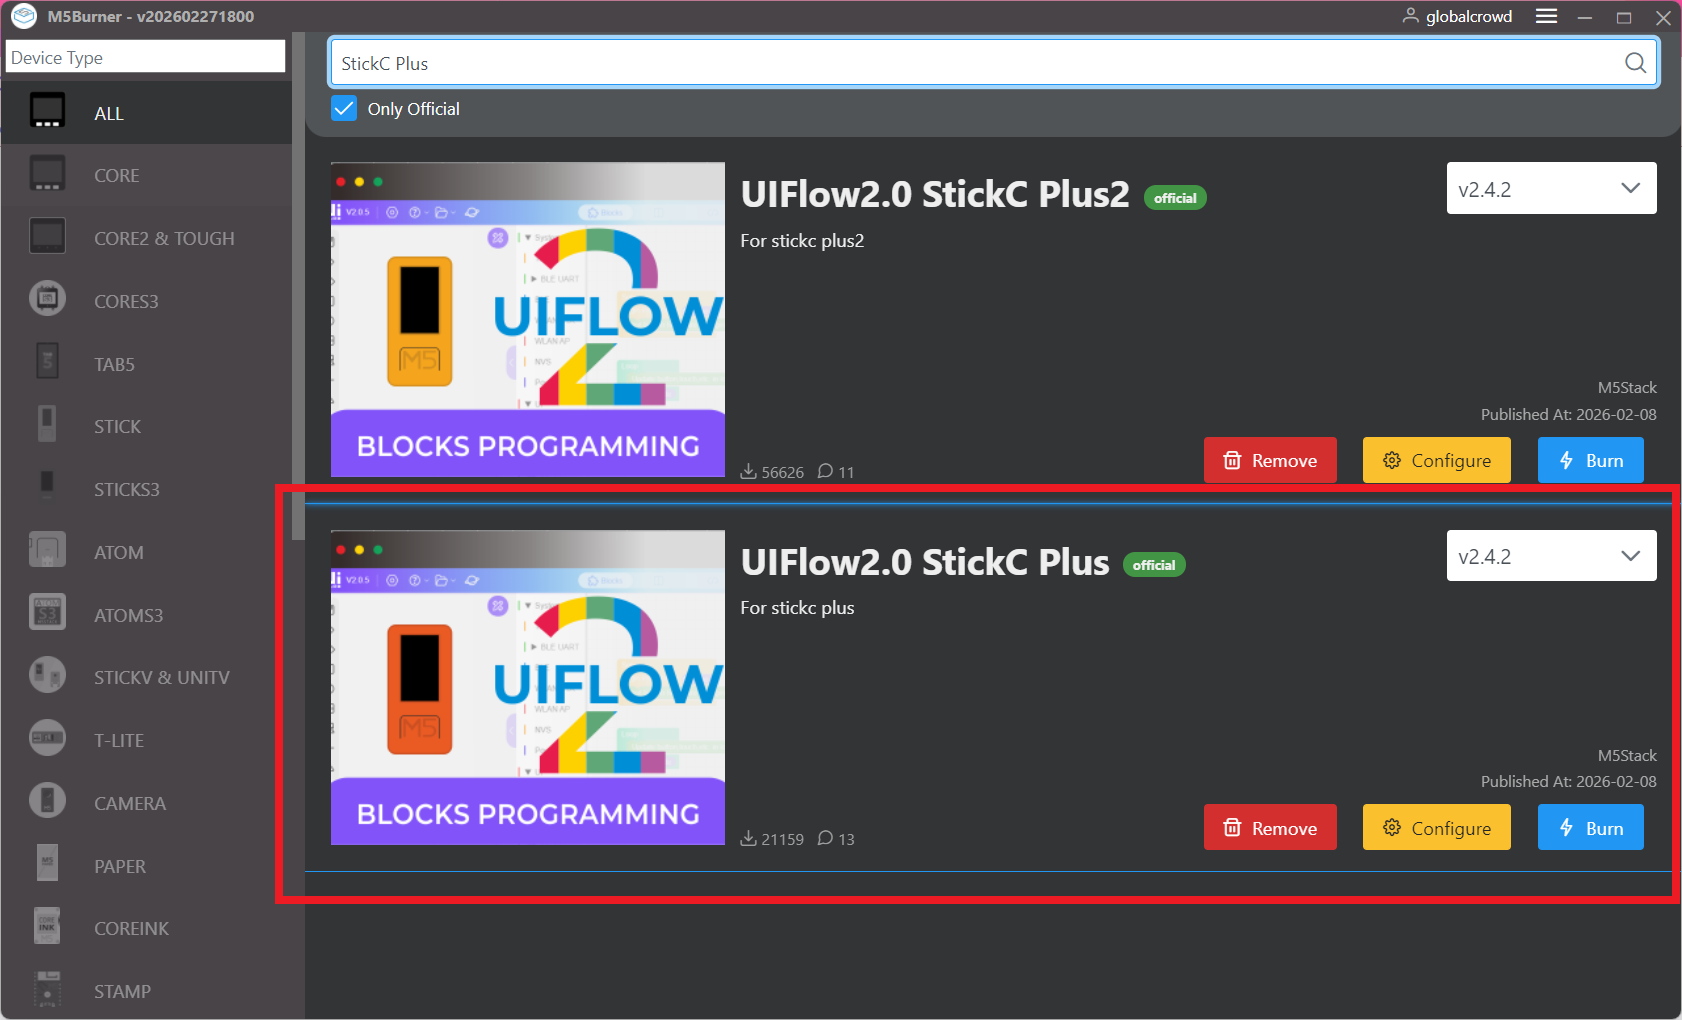
2b. Burn UIFlow 2 Firmware with M5Burner
Section titled “2b. Burn UIFlow 2 Firmware with M5Burner”New devices need UIFlow 2 firmware before they can connect to the browser IDE. While M5Burner is downloading, get the session WiFi credentials from the instructor.
- Download M5Burner from m5stack.com/pages/download
- Install and open M5Burner
- Log in to your M5Stack account
- Plug in the StickC Plus — it should appear in M5Burner’s device list
- Click Bind to link the device to your M5Stack account
- In the WiFi settings, enter the session WiFi SSID and password
- Search StickC Plus — select UIFlow2.0 StickC Plus (not StickC Plus2) → click Burn
- Wait 2–3 minutes for the burn — do not unplug during this time
The device reboots automatically when the burn completes.
Step 3: Connect in UIFlow 2.0
Section titled “Step 3: Connect in UIFlow 2.0”- Open uiflow2.m5stack.com in Chrome or Edge
- Log in with your team UIFlow 2.0 account
- In the lower-right corner of UIFlow 2.0, find the connection mode selector
- Default shows:
Cloud Pair— click it - Change to: USB
- Default shows:
- Click Connect — your browser shows a serial port picker dialog
- Select your COM port from the list:
- Windows:
COM3,COM4, etc. - Mac:
/dev/tty.usbmodem...
- Windows:
- Click Connect
You should see a green connected indicator and your device name in the IDE.
Step 4: Run Your First Project
Section titled “Step 4: Run Your First Project”- Download the starter project: StickCPlus-KnightRider.m5f2
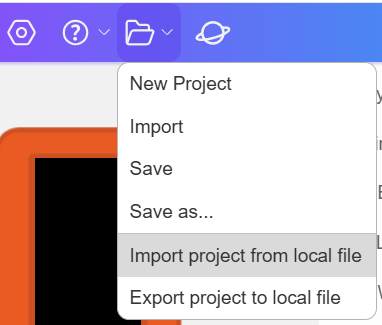
- In UIFlow 2.0, open the folder icon → Import project from local file → select the
.m5f2file
- Click Run (▶ button)
- Watch the LEDs animate on your device!
Once it’s running, explore the blocks: change LED colours, adjust speed, add conditions. You don’t need to understand everything yet — just start modifying and see what happens.
What to Build Next
Section titled “What to Build Next”Troubleshooting
Section titled “Troubleshooting”| Symptom | Quick Fix |
|---|---|
| Device not in Device Manager / unknown device | FTDI driver not installed — download setup executable from ftdichip.com/drivers/vcp-drivers/ |
| Blue Screen of Death when plugging in | Wrong driver installed (CH9102 or CP210x on FTDI hardware) — ask TA immediately |
| M5Burner does not see the device | Confirm FTDI driver installed and COM port visible in Device Manager before opening M5Burner |
| M5Burner says “Login required” | Create a free account at m5stack.com and log in |
| Burn fails partway through | Try a different USB port; confirm data cable (not charge-only) |
| Device stuck on loading screen after burn | WiFi credentials incorrect — re-open M5Burner and re-enter WiFi settings |
| API Key not showing on screen | Device has not connected to WiFi — check credentials in M5Burner |
| UIFlow shows “Disconnected” | API Key mismatch — check key on device screen matches what you entered |
| Mac + StickC Plus not detected | Known issue — speak to TA; use a Windows laptop if possible |
| Burned wrong firmware (StickC Plus2) | Device may be unresponsive — ask TA, do not attempt recovery alone |
If nothing works after 20 minutes: Ask your TA to use their laptop. No penalty — some PCs have IT restrictions that block USB serial access.
See the full Troubleshooting Guide for detailed solutions.
Was this page helpful?